
INSTALLING SEO ADDON
- Extract the module folders of compressed file on your computer.
- Upload module folders to your directory where your WHMCS was installed. ( your-whmcs-system/modules/addons/ )
- Enter the Admin Area of your WHMCS System.
- Click the Addon Modules sub-menu of SETUP which is on your admin panel.
- You will see WHMCSLAB SEO Module in list. Activate your module by clicking activate.

- You need to set access control of module after these steps, you can set permissions of your module like shown in the picture below..

"header.tpl" MODIFICATION
- Open your header.tpl in your theme directory via a Html Editor Software.
- You have to change your "title" line with "{$smarty.server.whmcslab.seo}" , example;
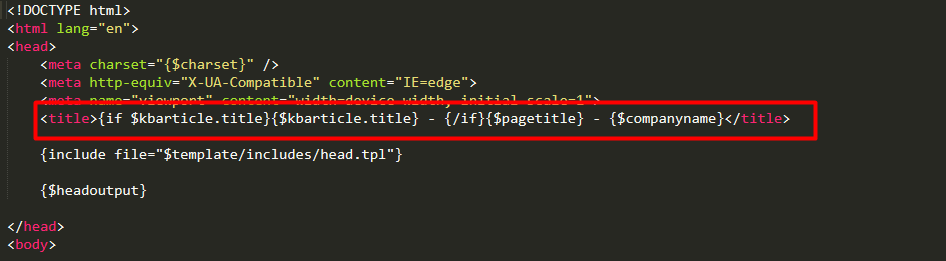
- Add the following code "{$smarty.server.whmcslab.seo}" example;
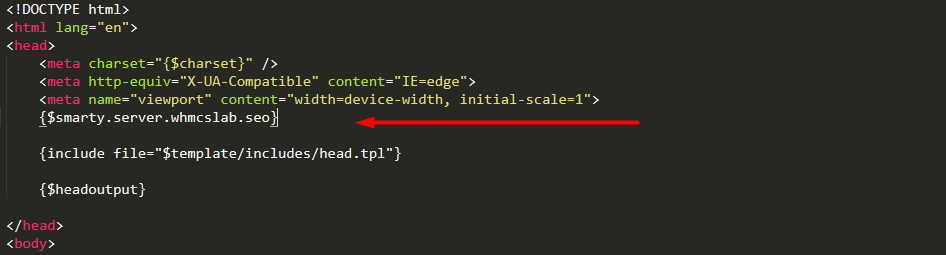
- Save the header.tpl and upload it to existing location.
Please ensure that you are running the latest version 7.5.1 WHMCS. Please log into your WHMCS Admin Area, navigate to Setup > General Settings > Other , set the "Encoded File Loading" option to "Attempt to load all files", and then click on the "Save Changes" button
